
Complete Reference
Quail How-To Guide
This guide covers the full purchase process, a practical tour of the Quail UI, and complete workflows for importing and exporting your book files.
1) Quick Start Checklist
- Download and install Quail for your platform.
- Open Quail and create your first project.
- Import your manuscript (or start writing in a blank project).
- Set metadata (title, author, language, ISBNs if available — separate fields for EPUB and PDF editions).
- Choose a theme and configure page size if exporting print PDF.
- Export EPUB and/or PDF, then review output before publishing.
2) Purchase and License Activation
Quail uses Stripe Checkout for secure payments. After purchase, your license key is delivered by email.
Purchase flow
- Click Buy license in the top navigation.
- Confirm product and price on the Stripe Checkout page.
- Enter your billing email and payment details.
- Submit payment and wait for checkout confirmation.
- Check your inbox for your license key email.
- Open Quail and paste your key in the license activation field.
License activation
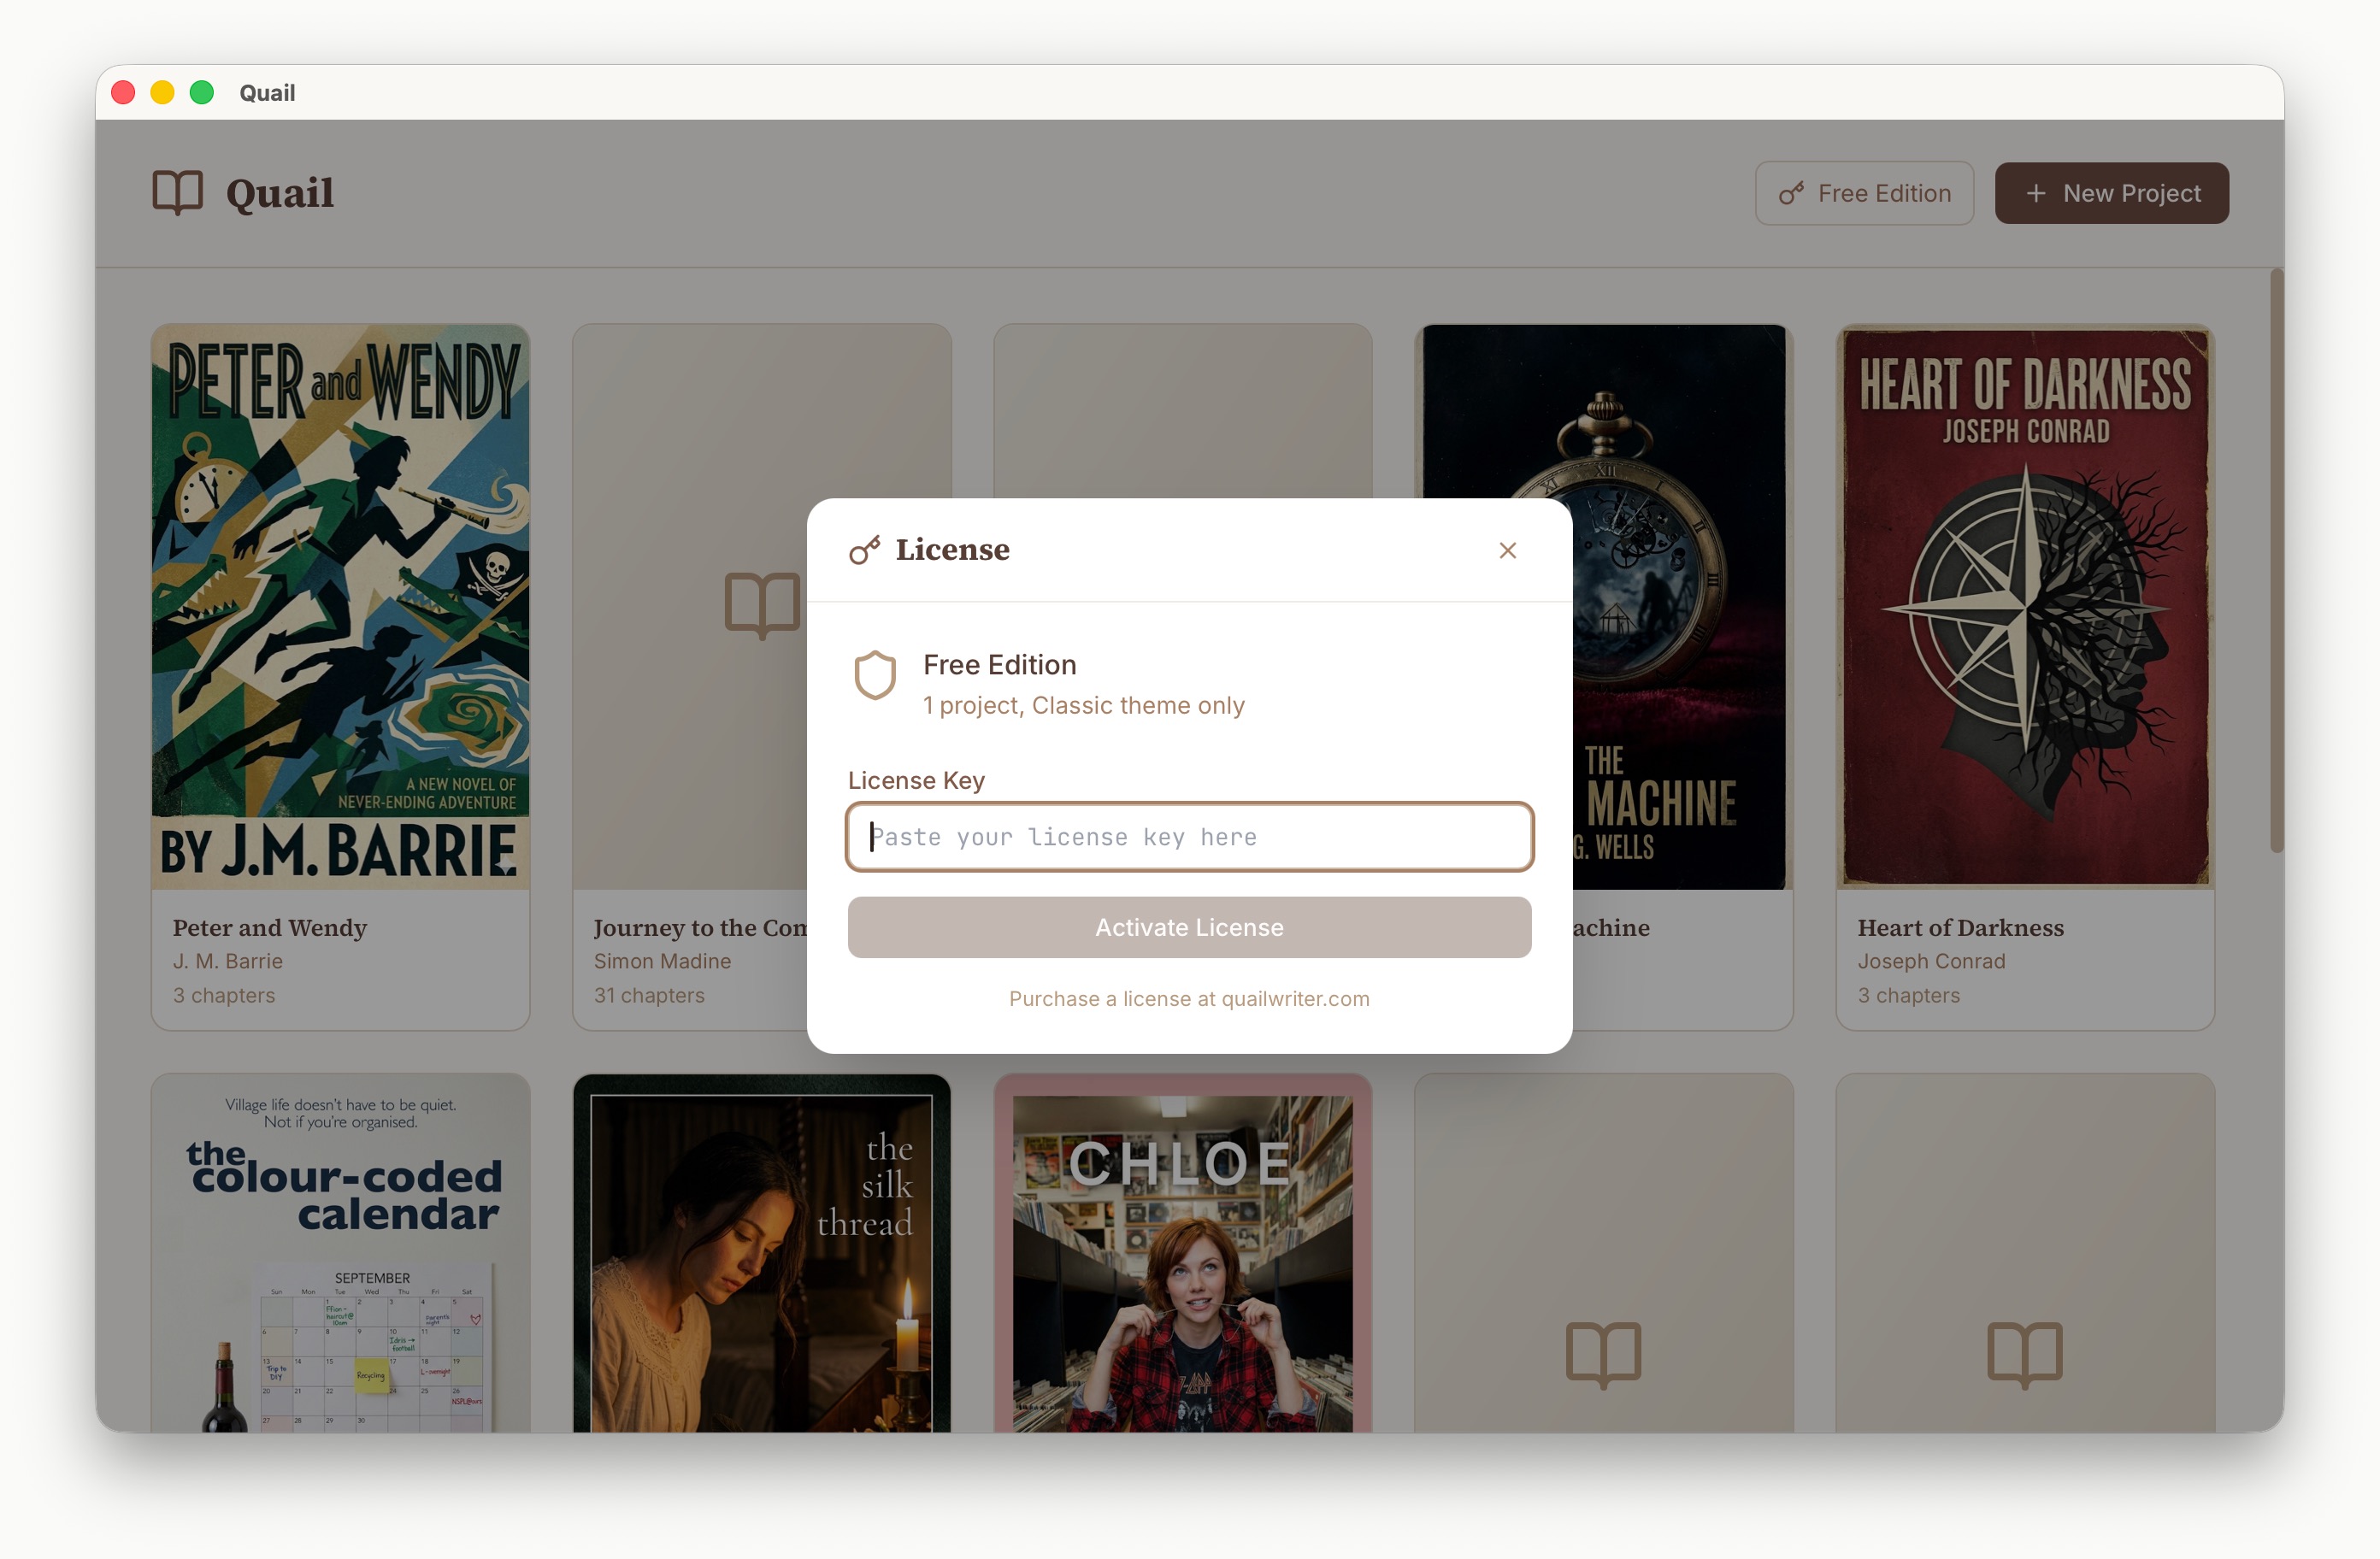
Activation verification
- The app should show a clear “License active” state.
- Premium themes and extra PDF sizes should become available.
- If activation fails, confirm copied key has no extra spaces.
3) UI Reference and Navigation
The Quail interface is organized for writing first, with project tools and publishing controls always within easy reach.
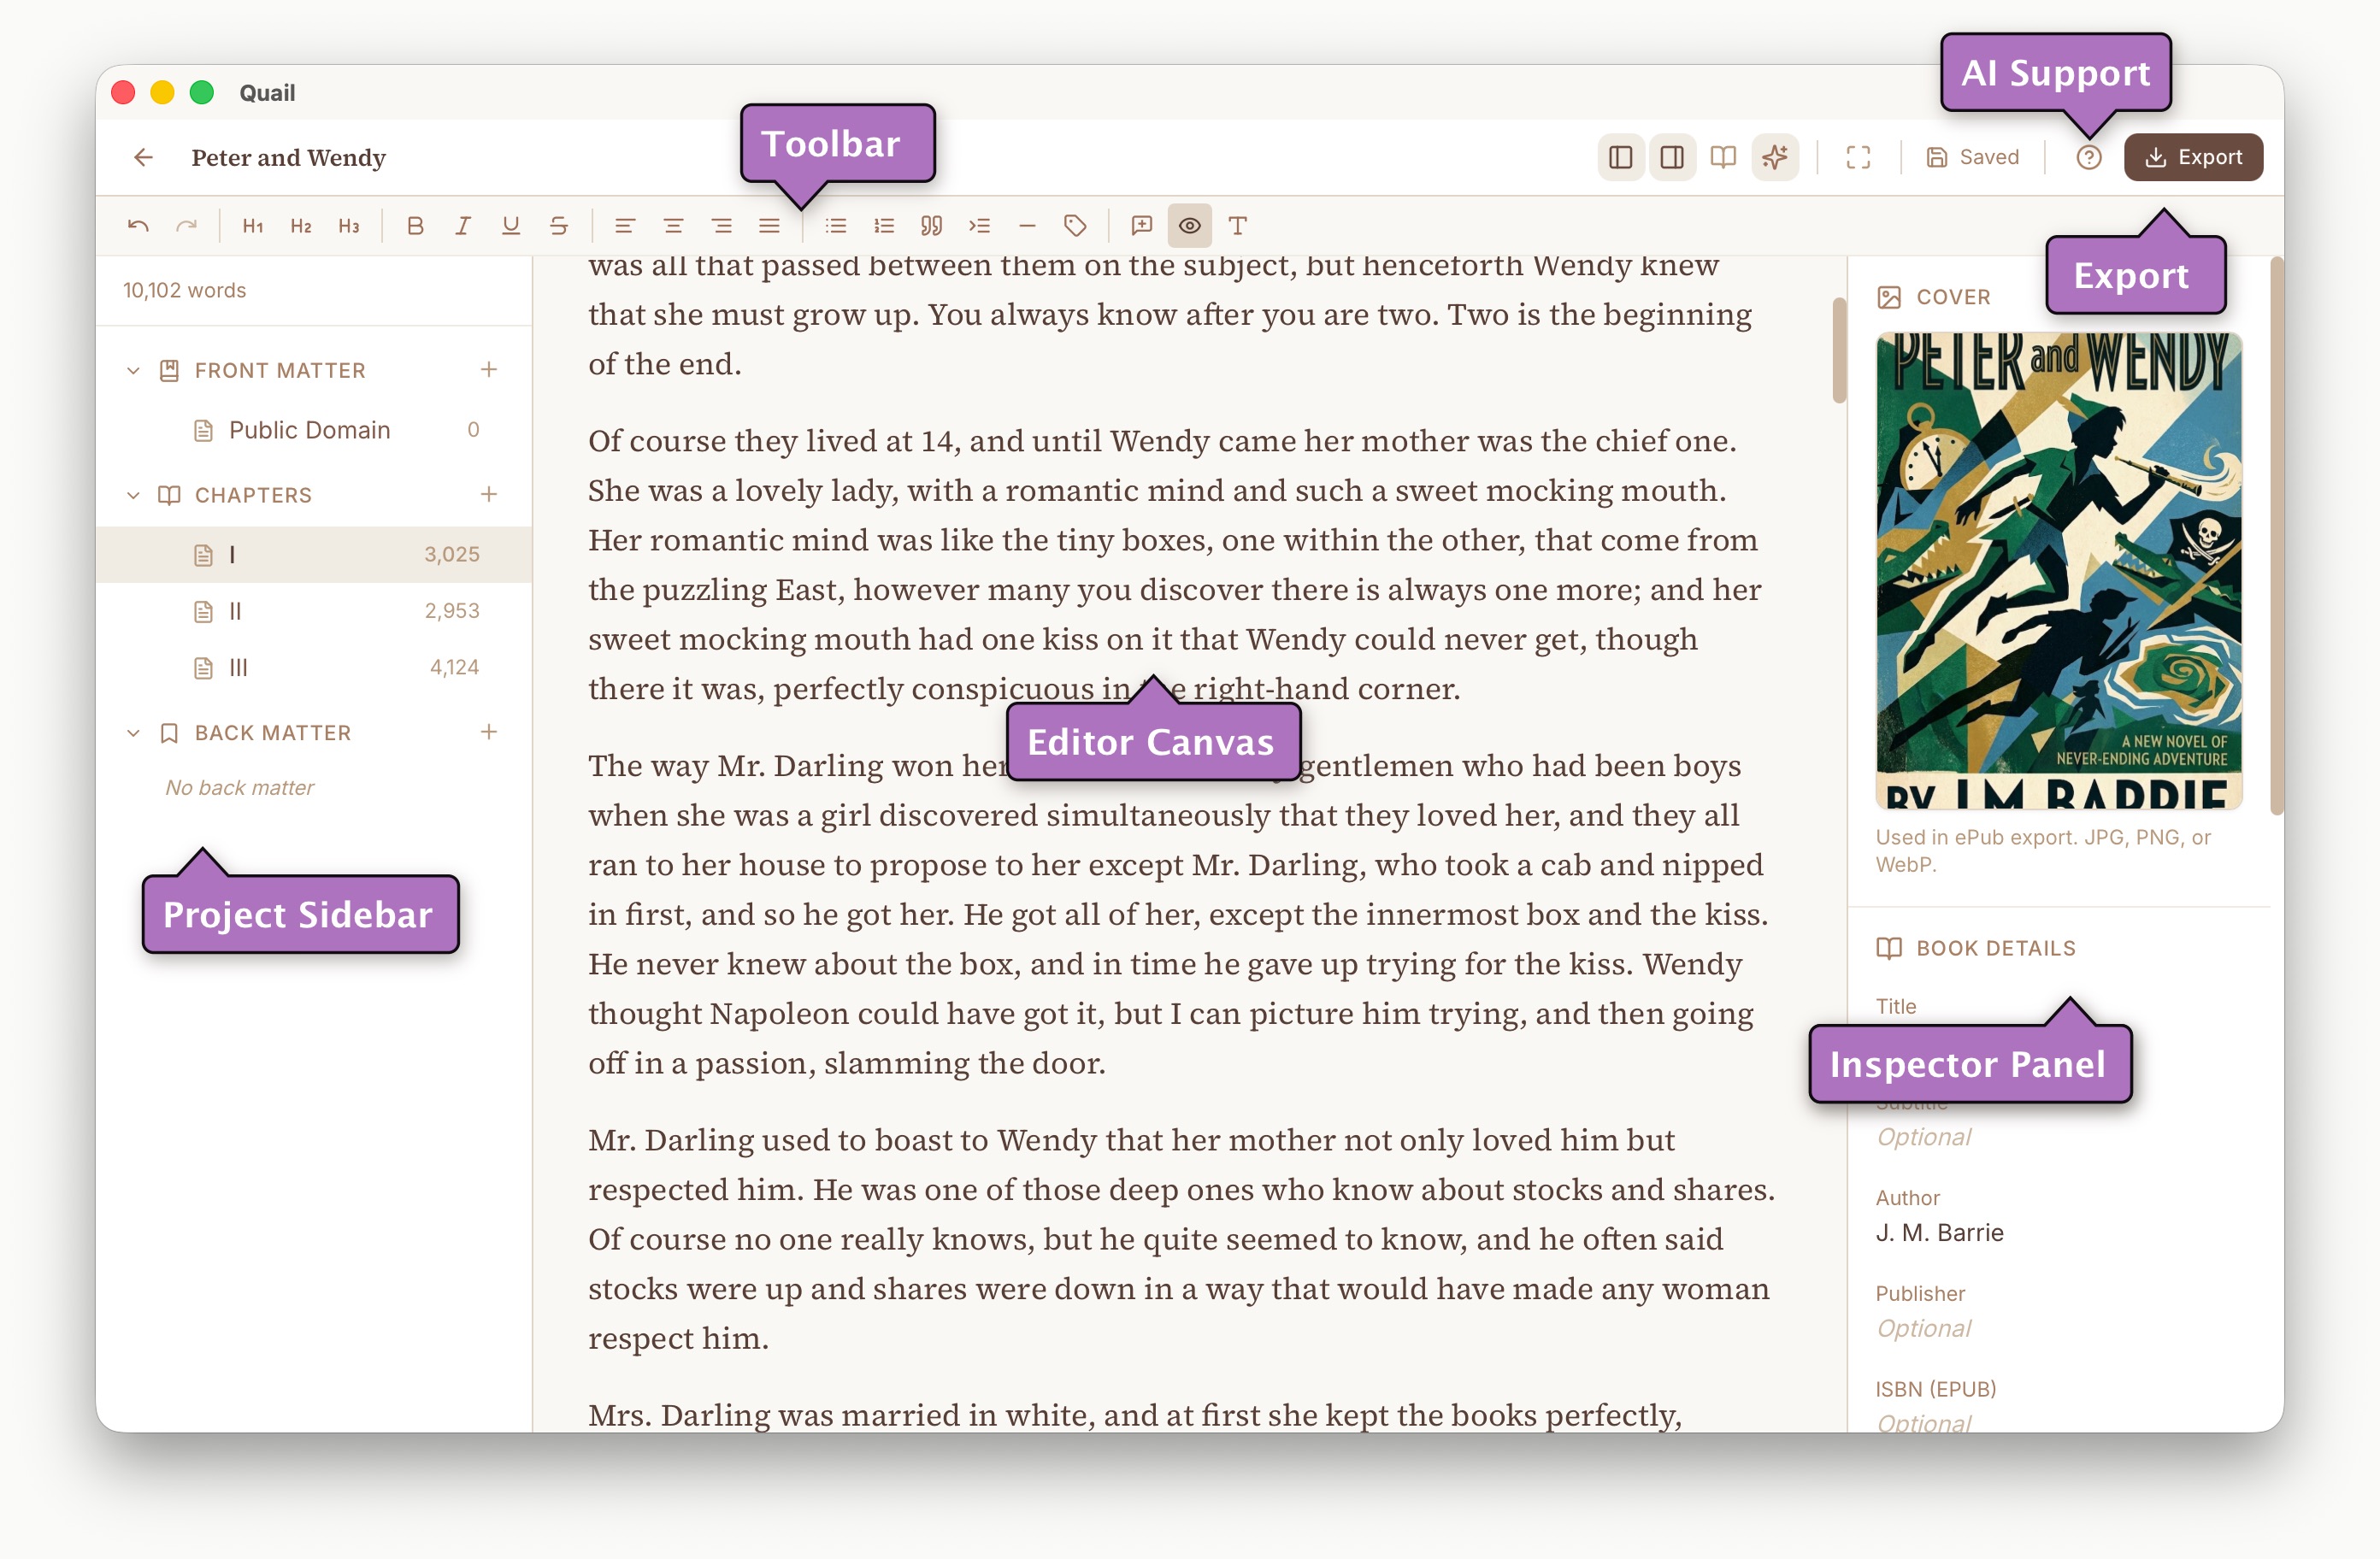
Main UI regions
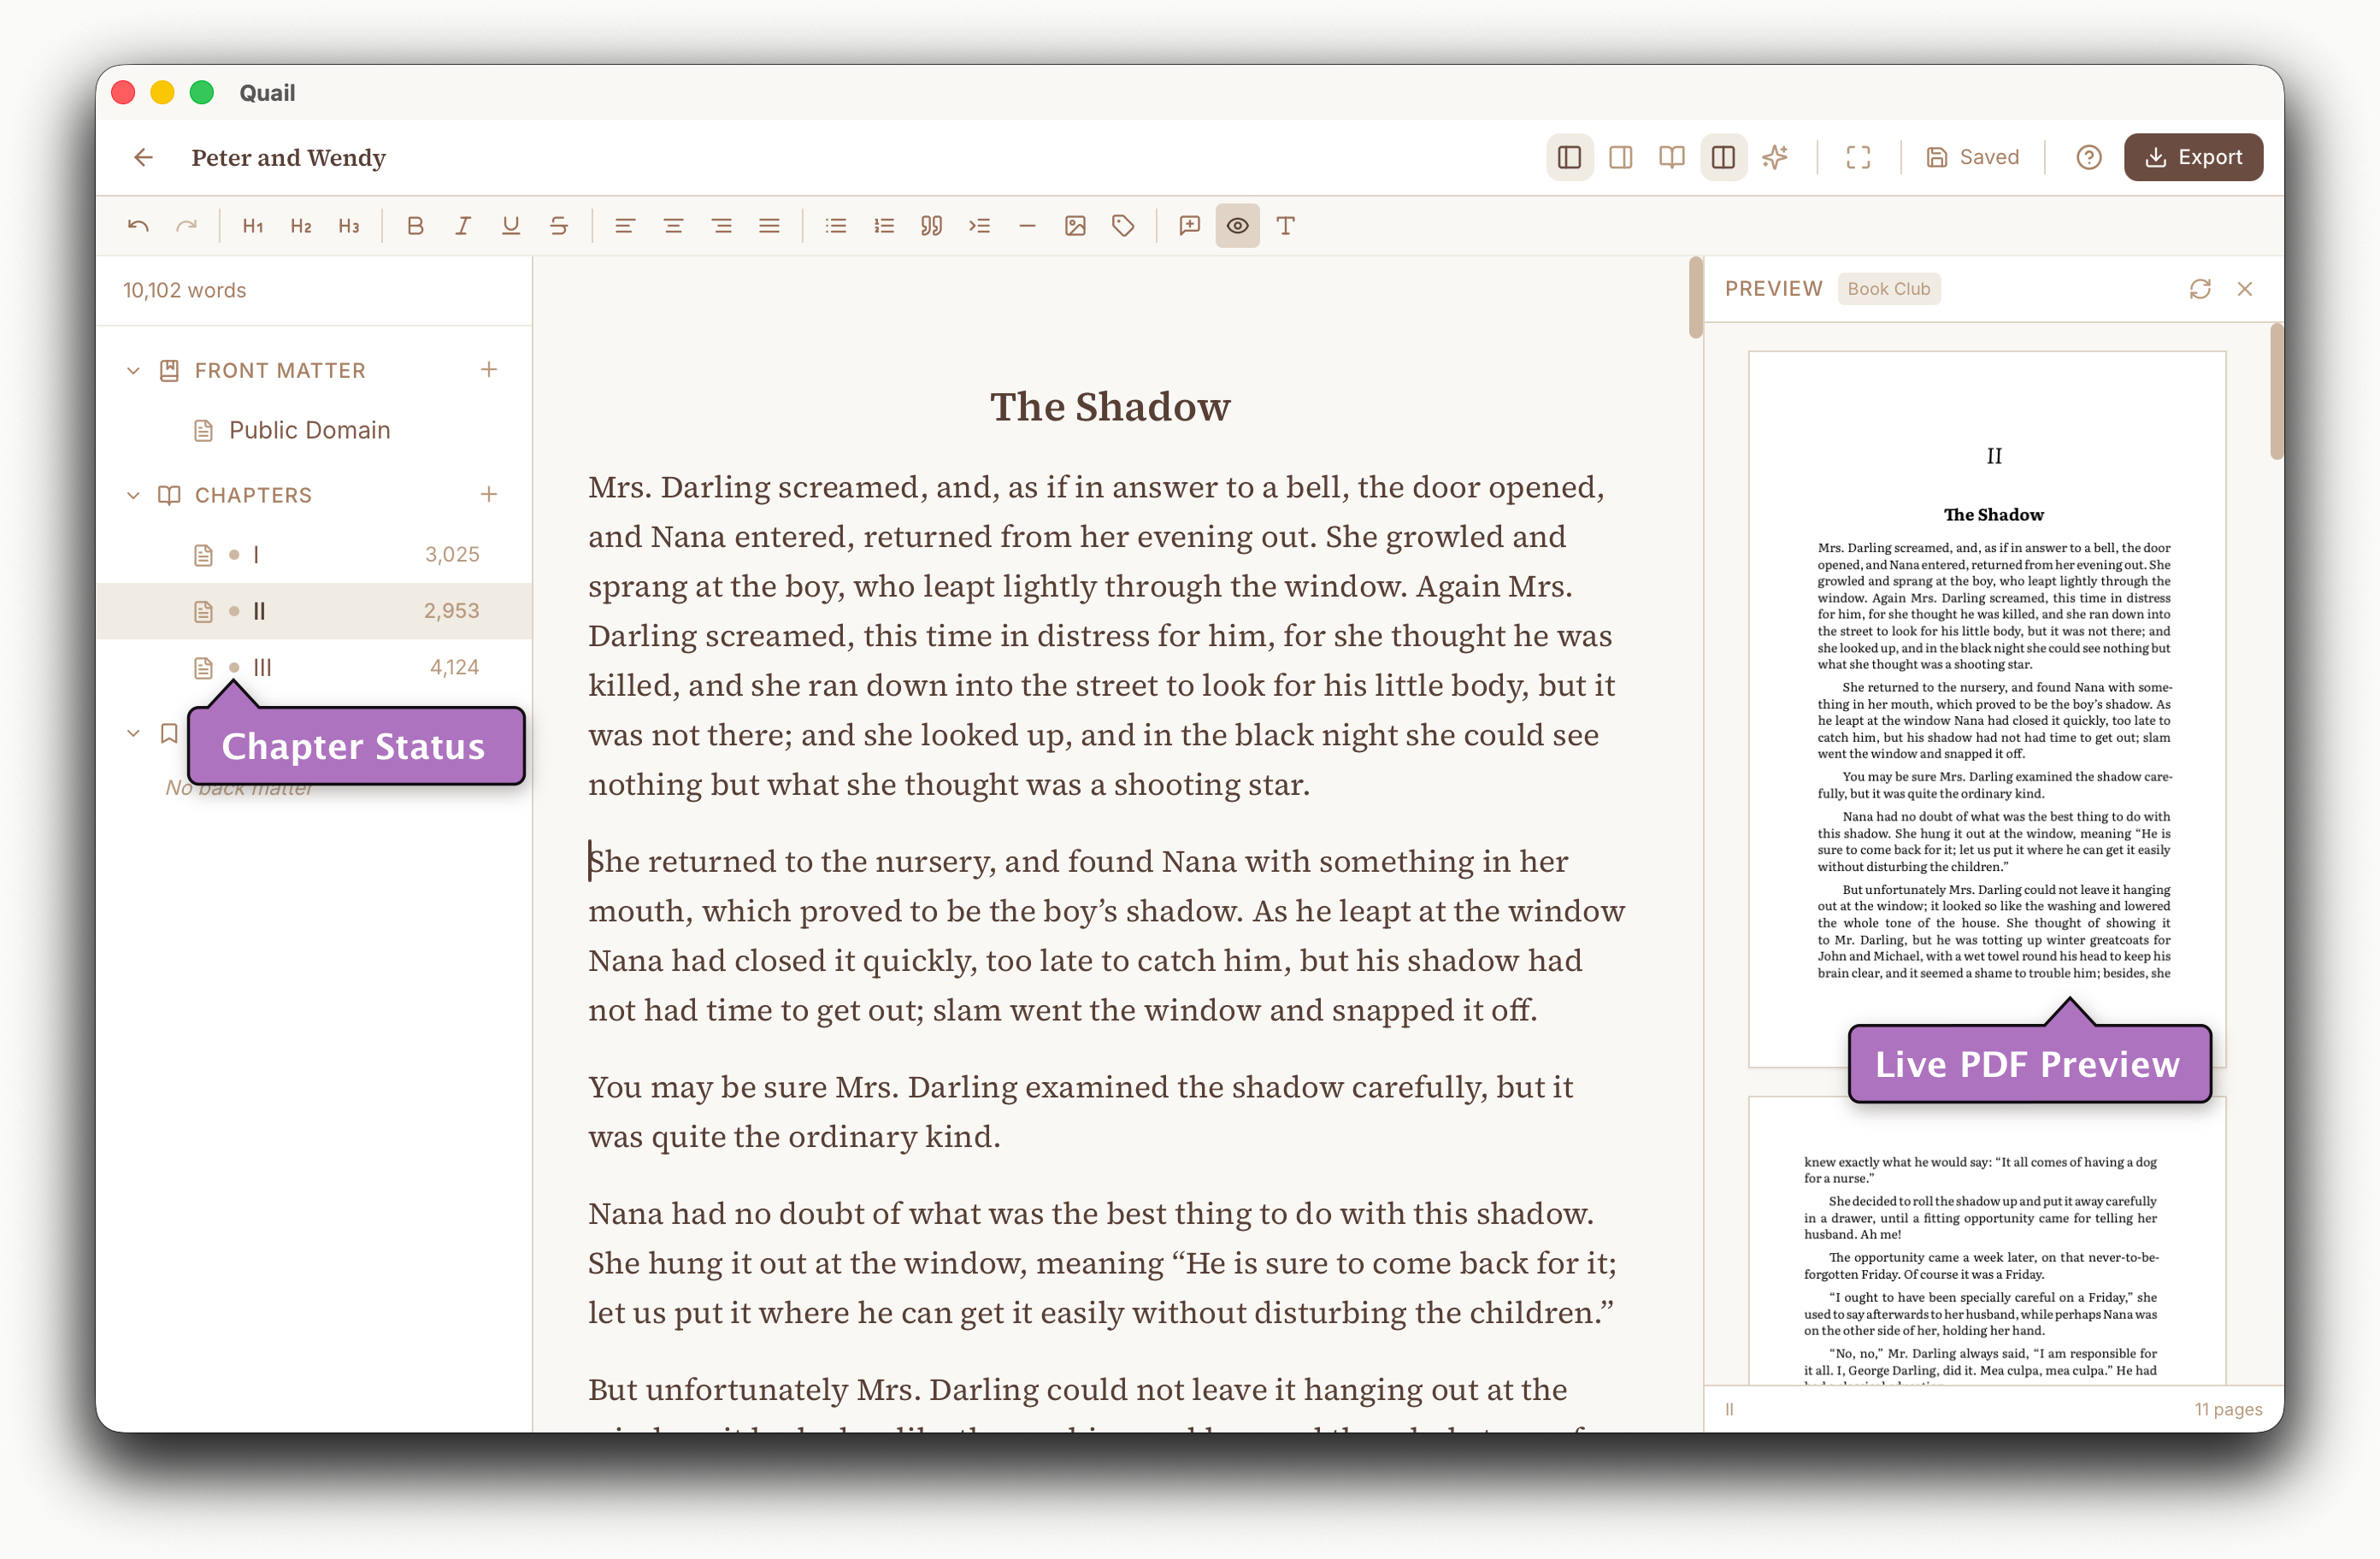
- Project sidebar (left): chapters, front matter, and back matter sections. Drag to reorder, add new sections, or insert from the built-in snippet library (copyright page, dedication, title page, and more). The Chapters section also accepts Parts (section dividers with a large centred title) and Blank pages (for forcing pagination in print). Every chapter shows a small coloured status dot — Draft, In progress, Complete, or Final.
- Editor (centre): rich text editing with a format bar for headings, bold/italic/underline, alignment, lists, block quotes, horizontal rules, an image insert button (PNG/JPEG; centred block-level images with optional caption), and an ISBN tag button. Select text and a small Ask AI pill appears for inline realism checks. A distraction-free focus mode hides everything except the text.
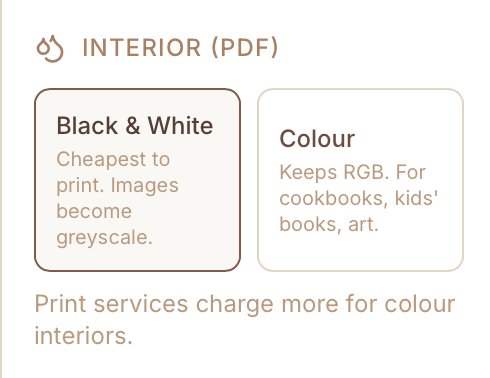
- Inspector (right): cover image, book details (title, subtitle, author, publisher, ISBN for EPUB, ISBN for PDF, language), chapter settings including a status dropdown (Draft / In progress / Complete / Final) and a show chapter heading in export toggle, word count statistics, a writing goal section (target words, target date, daily goal — with progress bar, suggested pace, and streak), export theme picker, PDF page size selector, and an Interior (PDF) toggle for Black & White vs. Colour print.
- Live Preview (right): side-by-side typeset PDF of the current chapter using the project’s theme and trim size. Re-renders as you write so you can see how the page will look in print.
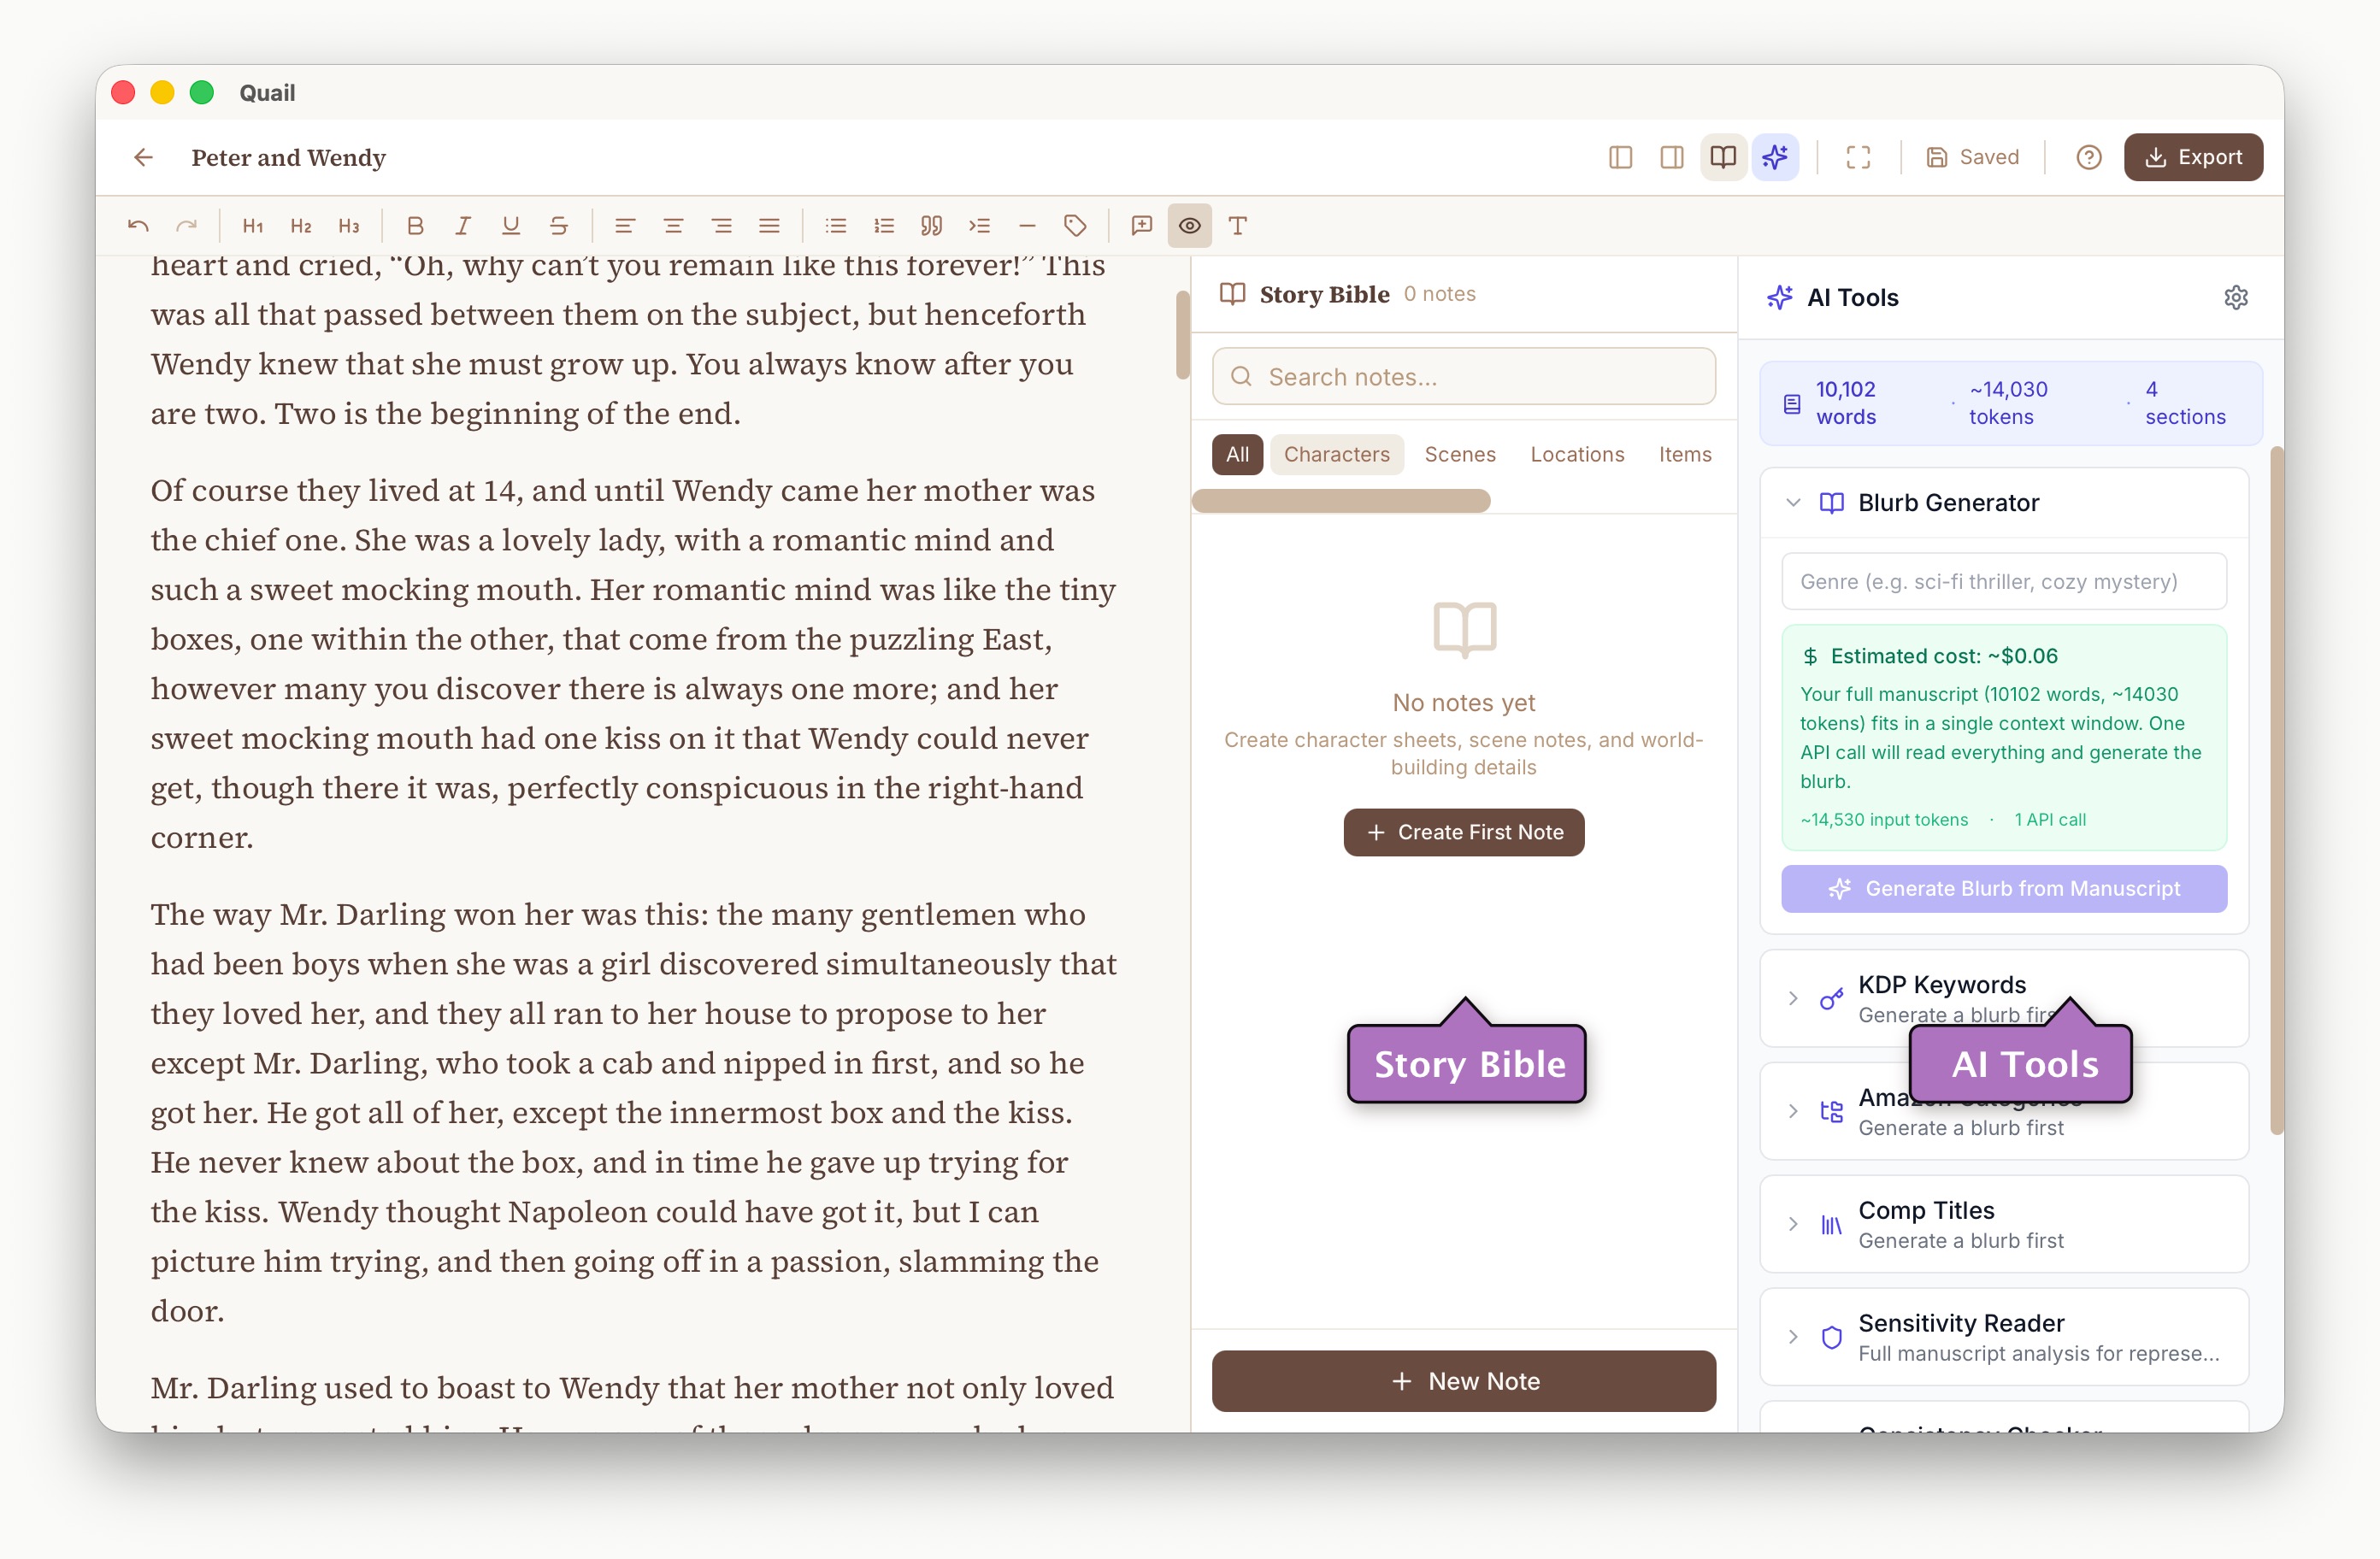
- Story Bible (right): project-specific notes organised by category — characters, scenes, locations, items, factions, events, themes, research (URL/source, topic, summary), and custom. Searchable and taggable.
- AI Tools (right): generate blurbs, KDP keywords, Amazon categories, comp titles, run a sensitivity reader, consistency checker, story bible generator, and timeline tracker. Uses your own API key (OpenAI, Anthropic, or a local model).
- App bar (top): project title, panel toggles (sidebar, inspector, story bible, live preview, AI tools), focus-mode button, save status, and the Export button.
Main UI regions
Writing features
- Find & Replace (Ctrl/⌘+F) with case-sensitive matching, match-by-match navigation (Enter / Shift+Enter or Ctrl/⌘+G), and replace all.
- Inline comments — highlight text and attach notes visible only in the editor, never in exports.
- Smart quotes — one-click conversion of straight quotes to typographic curly quotes throughout the document.
- Interior images — insert PNG or JPEG files inline in any chapter. Images are stored inside the project folder, deduplicated by content hash, and shown in both the editor and Live Preview.
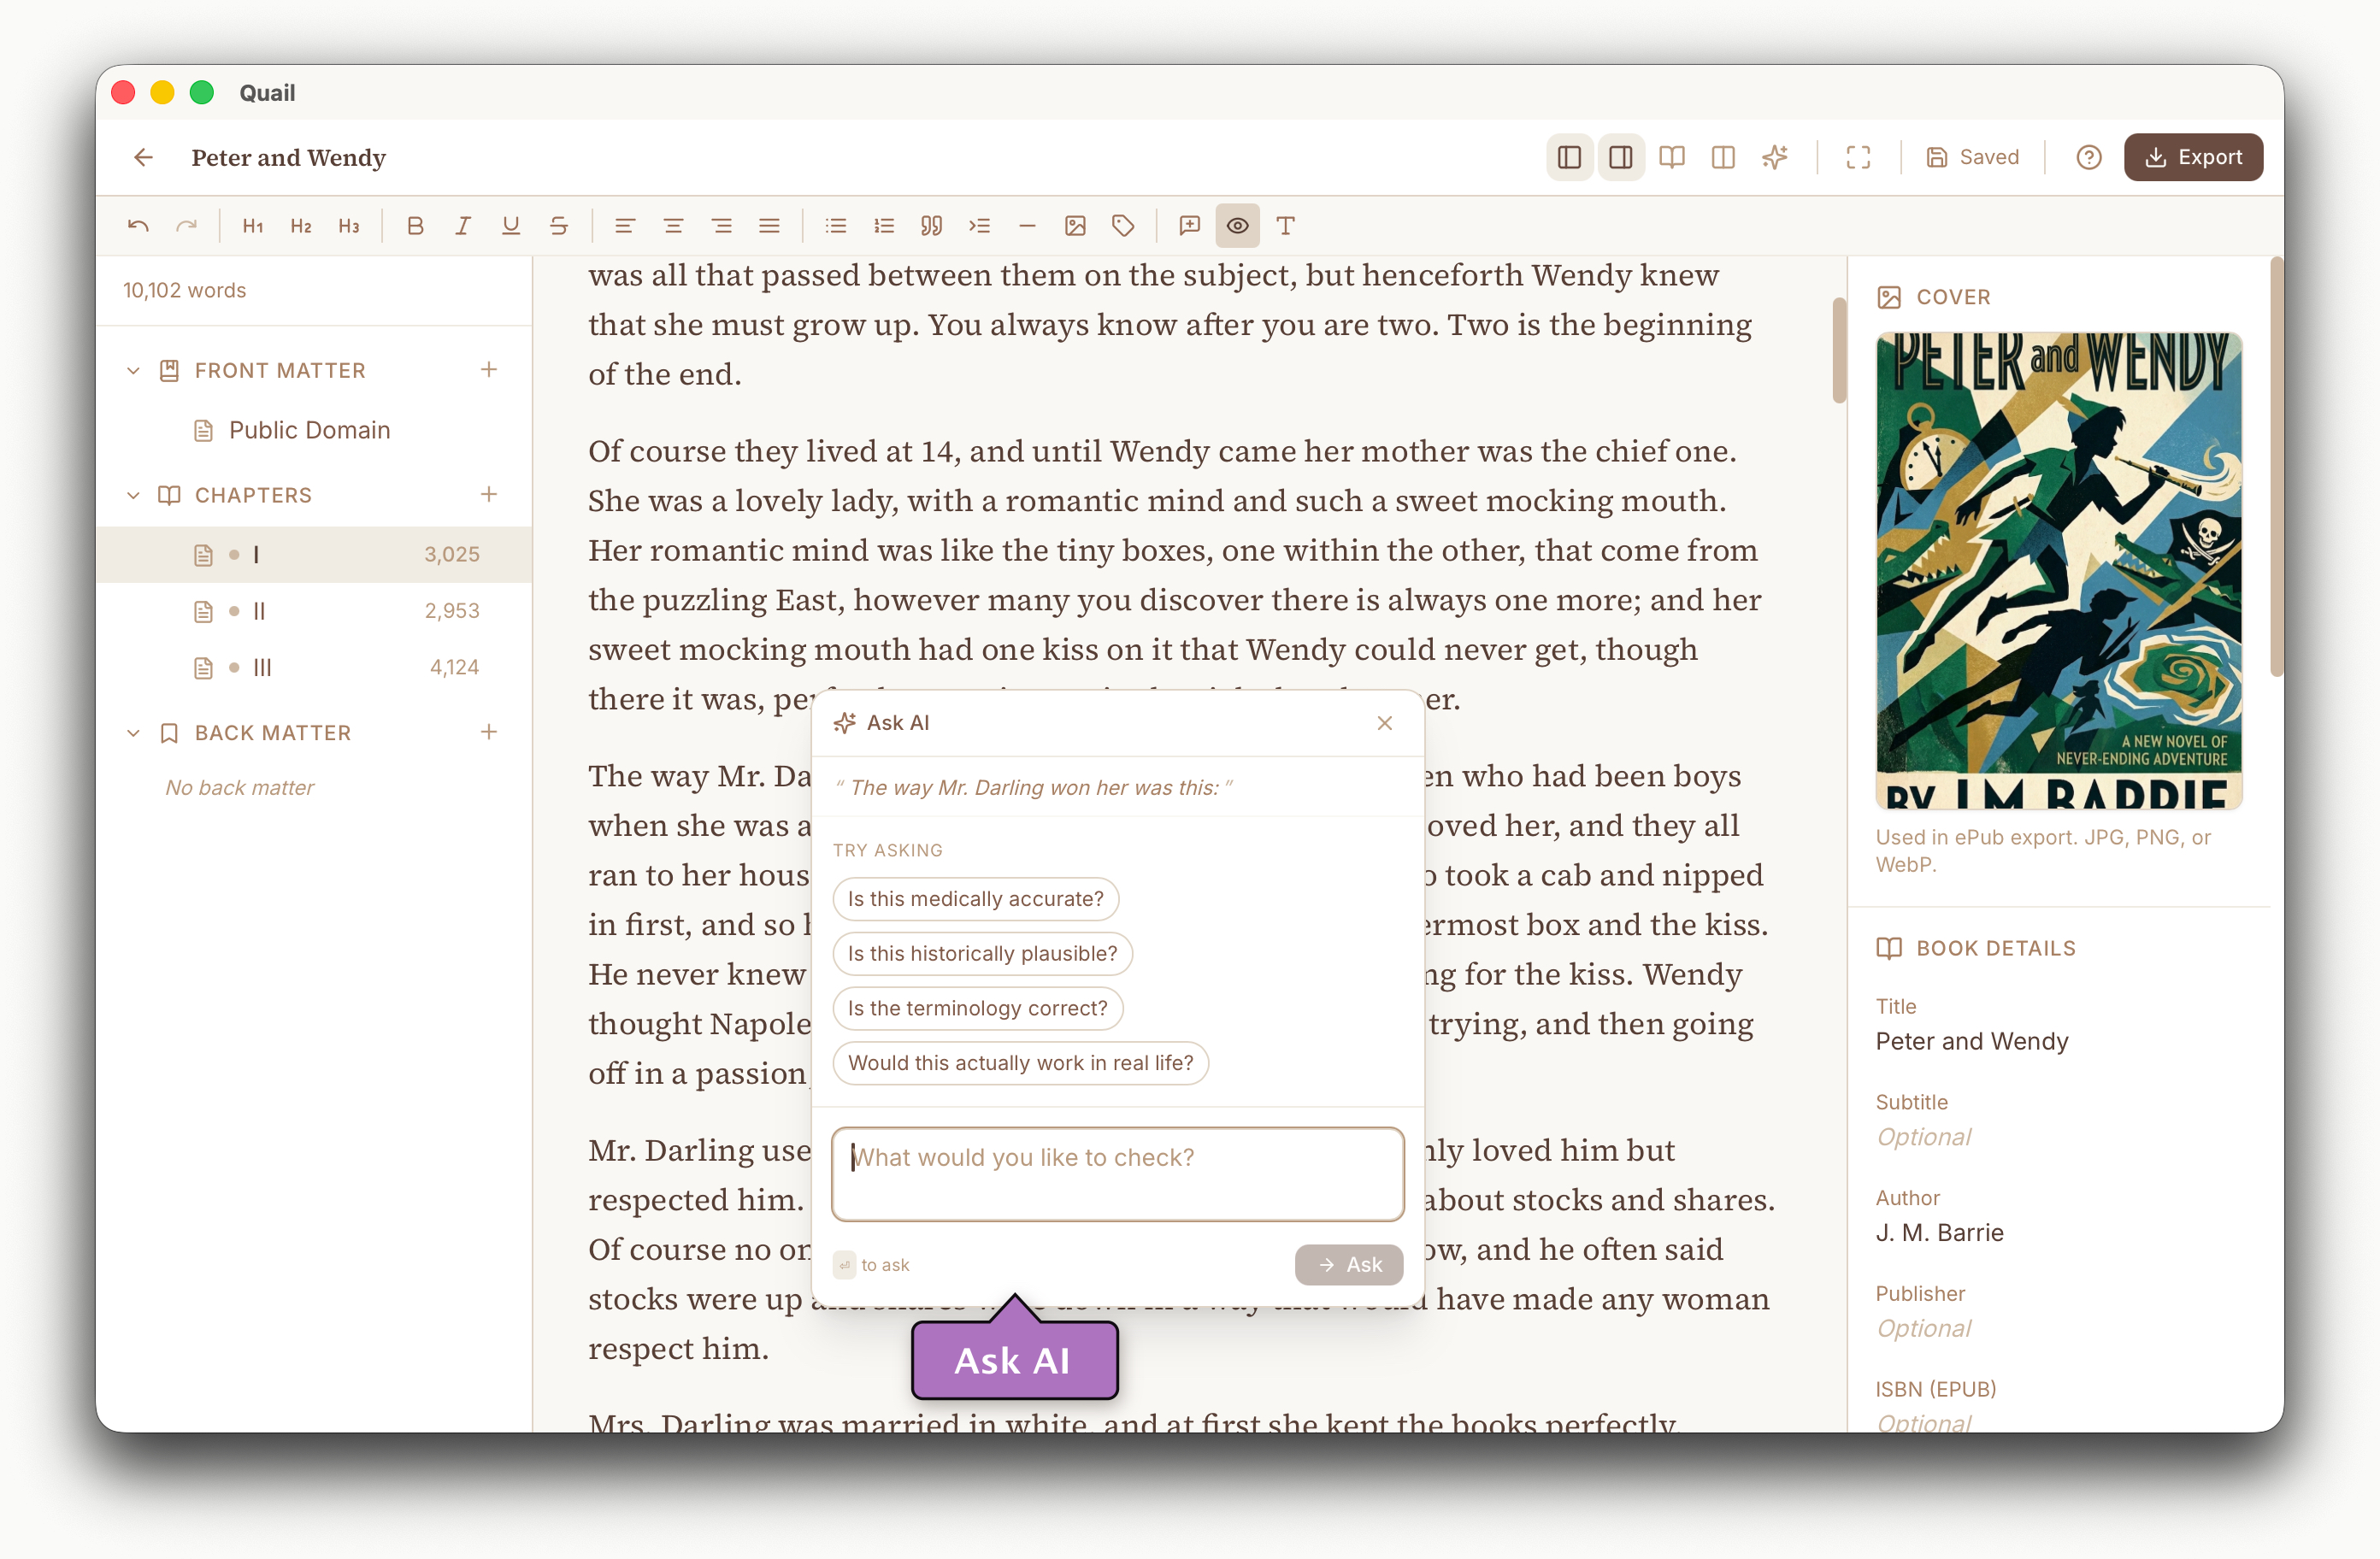
- Realism check (Ask AI) — select any passage and a small Ask pill appears above it. Click for a popover with suggested prompts ("Is this medically accurate?", "Is this historically plausible?", "Is the terminology correct?"), a textarea for your own question, and a conversation area that keeps follow-ups in context. Requires the LLM to be configured.
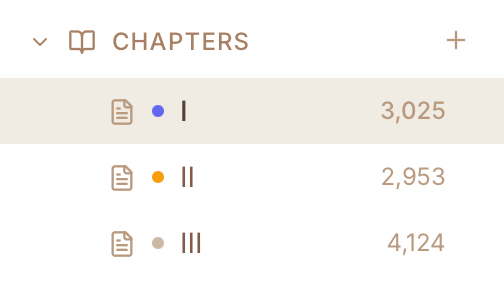
- Chapter status — mark each chapter as Draft, In progress, Complete, or Final. Sidebar dots and the Inspector dropdown stay in sync.
- Writing goals — set a total target, target date, and daily goal in the Inspector. Quail tracks progress, suggests a daily pace, and counts your streak.
- {{ISBN}} tag — insert on your copyright page and Quail automatically substitutes the correct ISBN for each export format (EPUB edition or PDF/print edition).
- Snippets — reusable templates for common front and back matter pages. Built-in templates for copyright, title page, dedication, acknowledgements, about the author, and more. Save your own for reuse across projects.
- Auto-save — your work is saved automatically a couple of seconds after you stop typing.
Chapter status at a glance
Realism check — Ask AI inline
Toolbar icons
The format bar sits above the editor; panel and focus controls live on the app bar.
Format bar
Undo & redo
Headings
Bold, italic, underline, strikethrough
Alignment: left, centre, right, justified
Lists, blockquote, indent, section break, image, insert tag
Comments and smart quotes
App bar (top)
Chapter overview (sidebar), Inspector, Story Bible, Live Preview, and AI Tools are toggled from the top bar. Distraction-free mode expands the editor and hides chrome until you exit (for example with Esc).
AI tools and Story Bible
Live Preview
4) Importing a Book
Quail can import .docx (Microsoft Word) files, splitting them into chapters and preserving formatting so you can edit, structure, and publish from one place.
Recommended pre-import checks
- Make a backup copy of your source manuscript first.
- Use consistent heading styles (Heading 1 for chapter titles) — Quail uses these to detect chapter breaks.
- Remove tracked changes/comments if your workflow requires clean text.
Import workflow
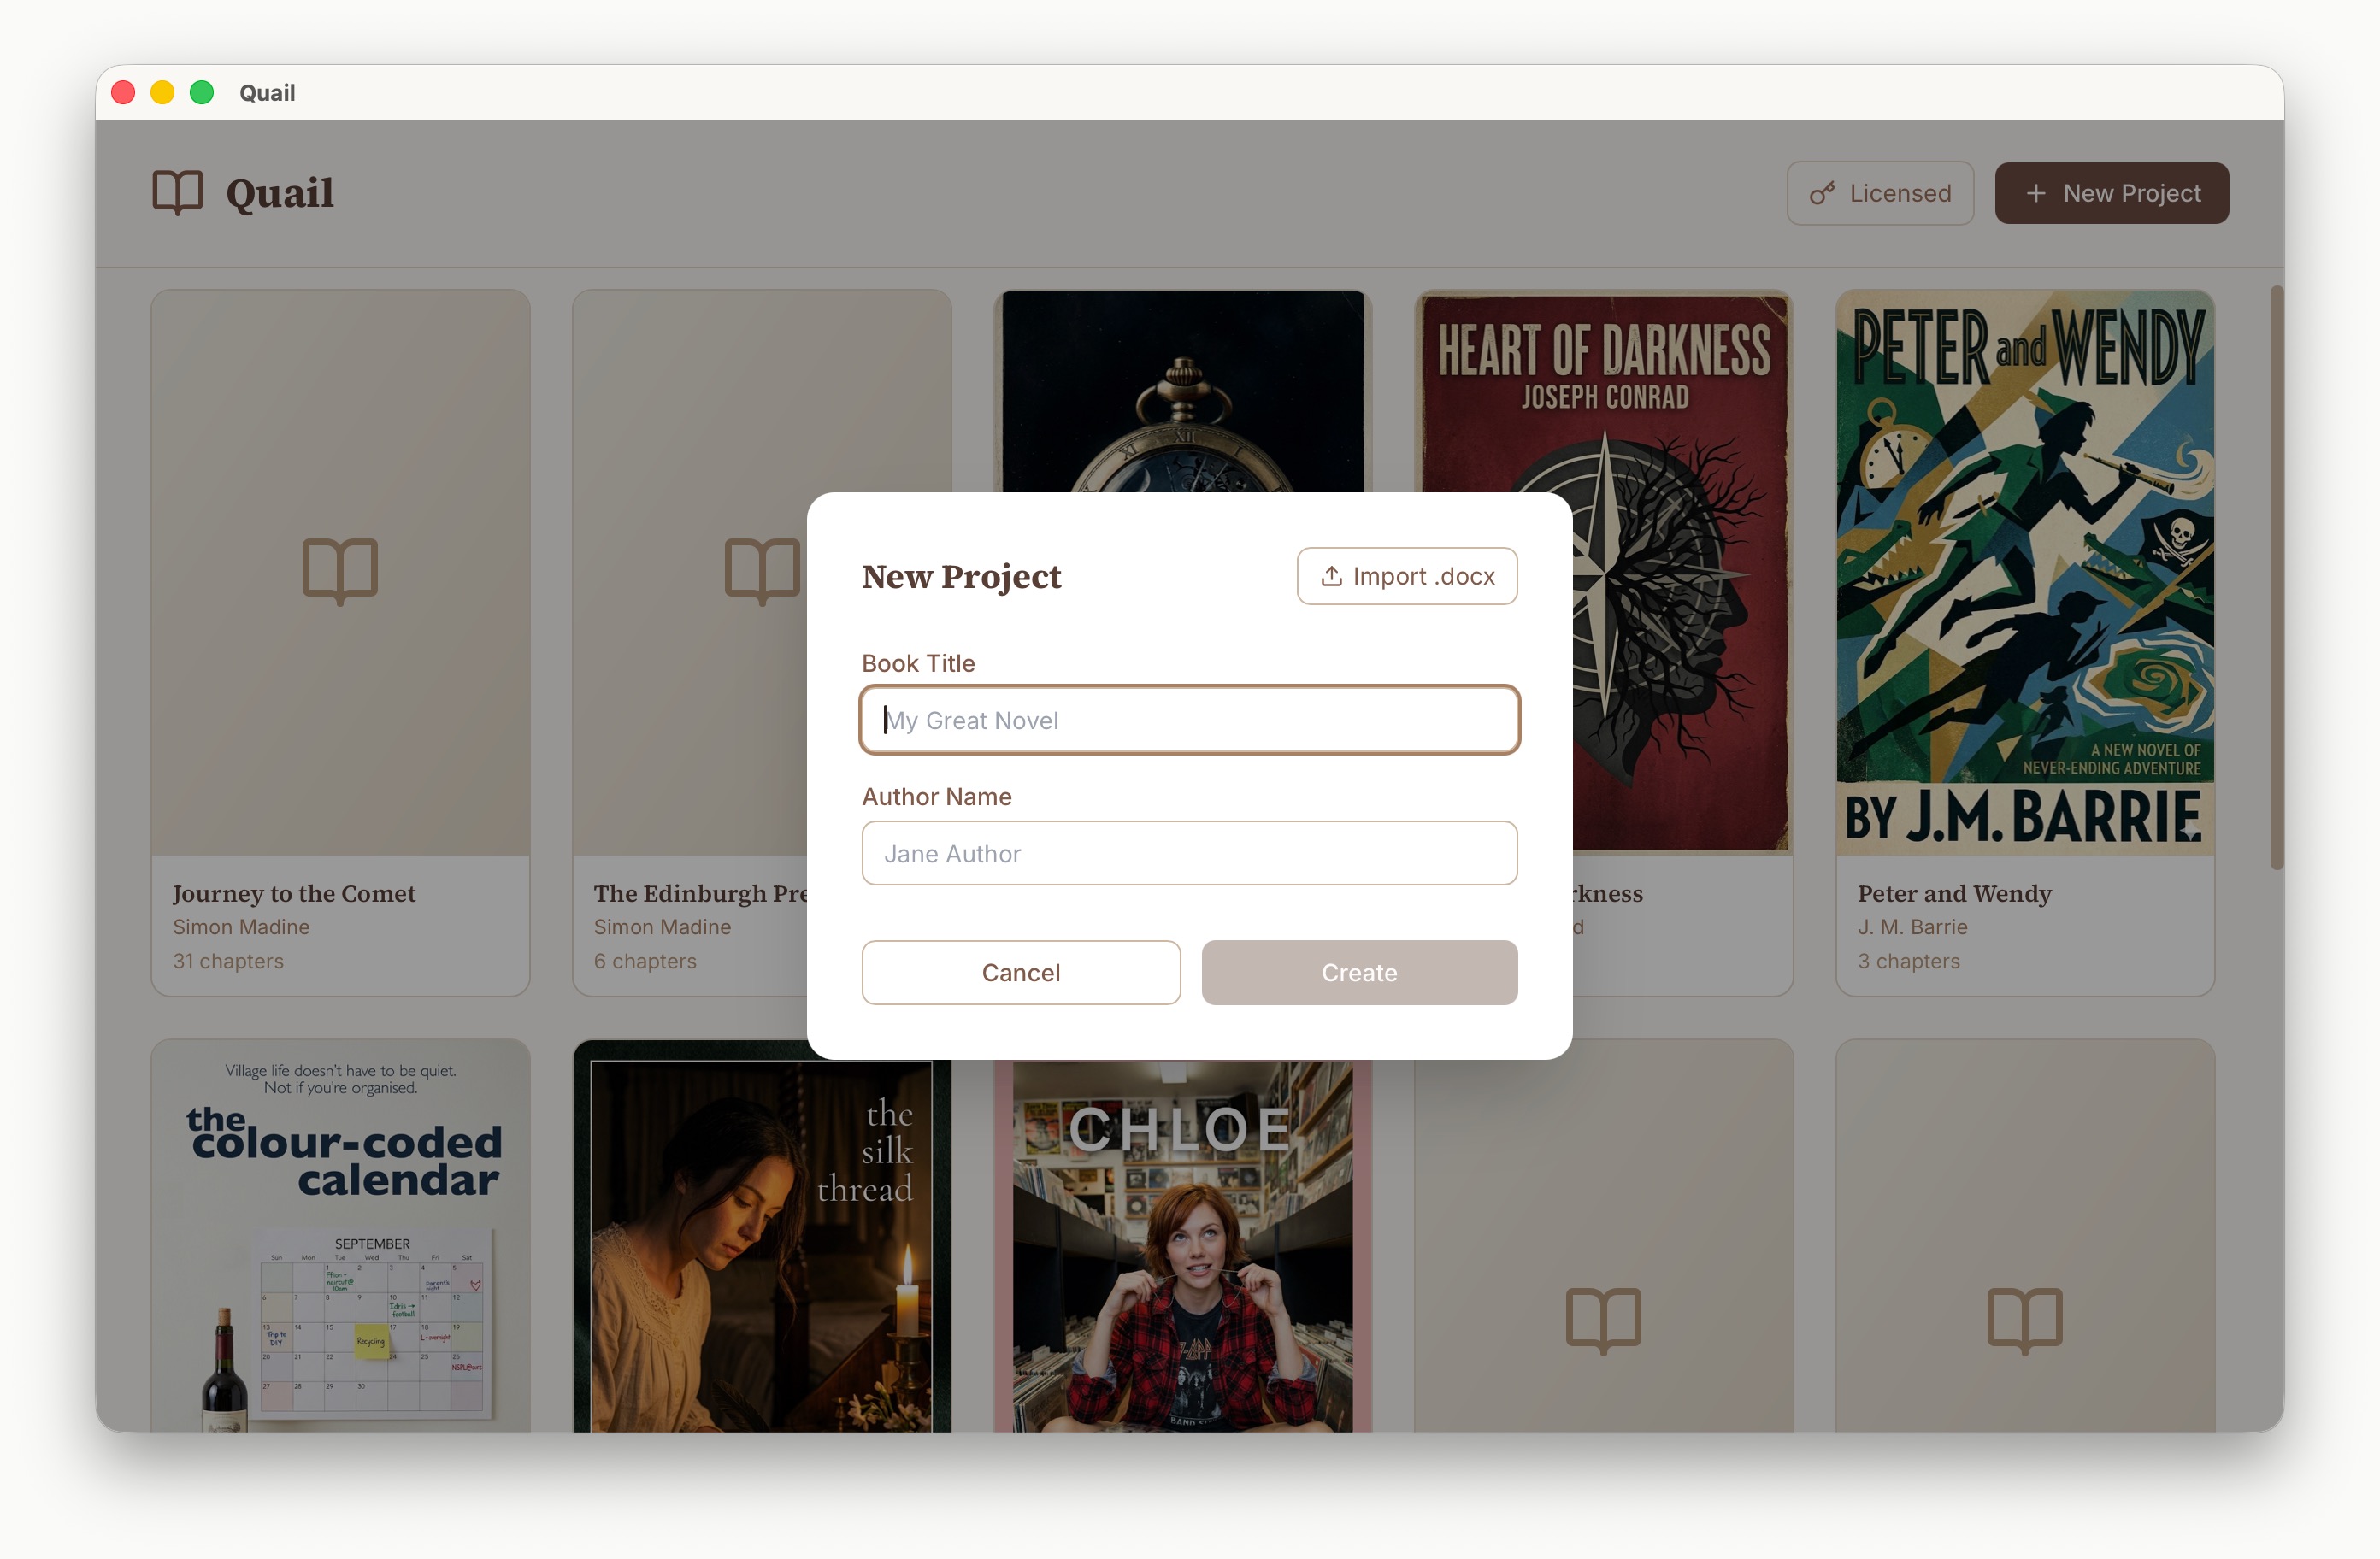
- From the library, click New Project and choose Import from Word.
- Select your .docx file. Quail shows a preview with the detected title, author, and chapter list.
- Confirm and create the project — chapters appear in the sidebar.
- Review imported chapters and adjust order, titles, or formatting (scene breaks, italics, headings) as needed.
New Project or Import from Word
5) Exporting EPUB and PDF
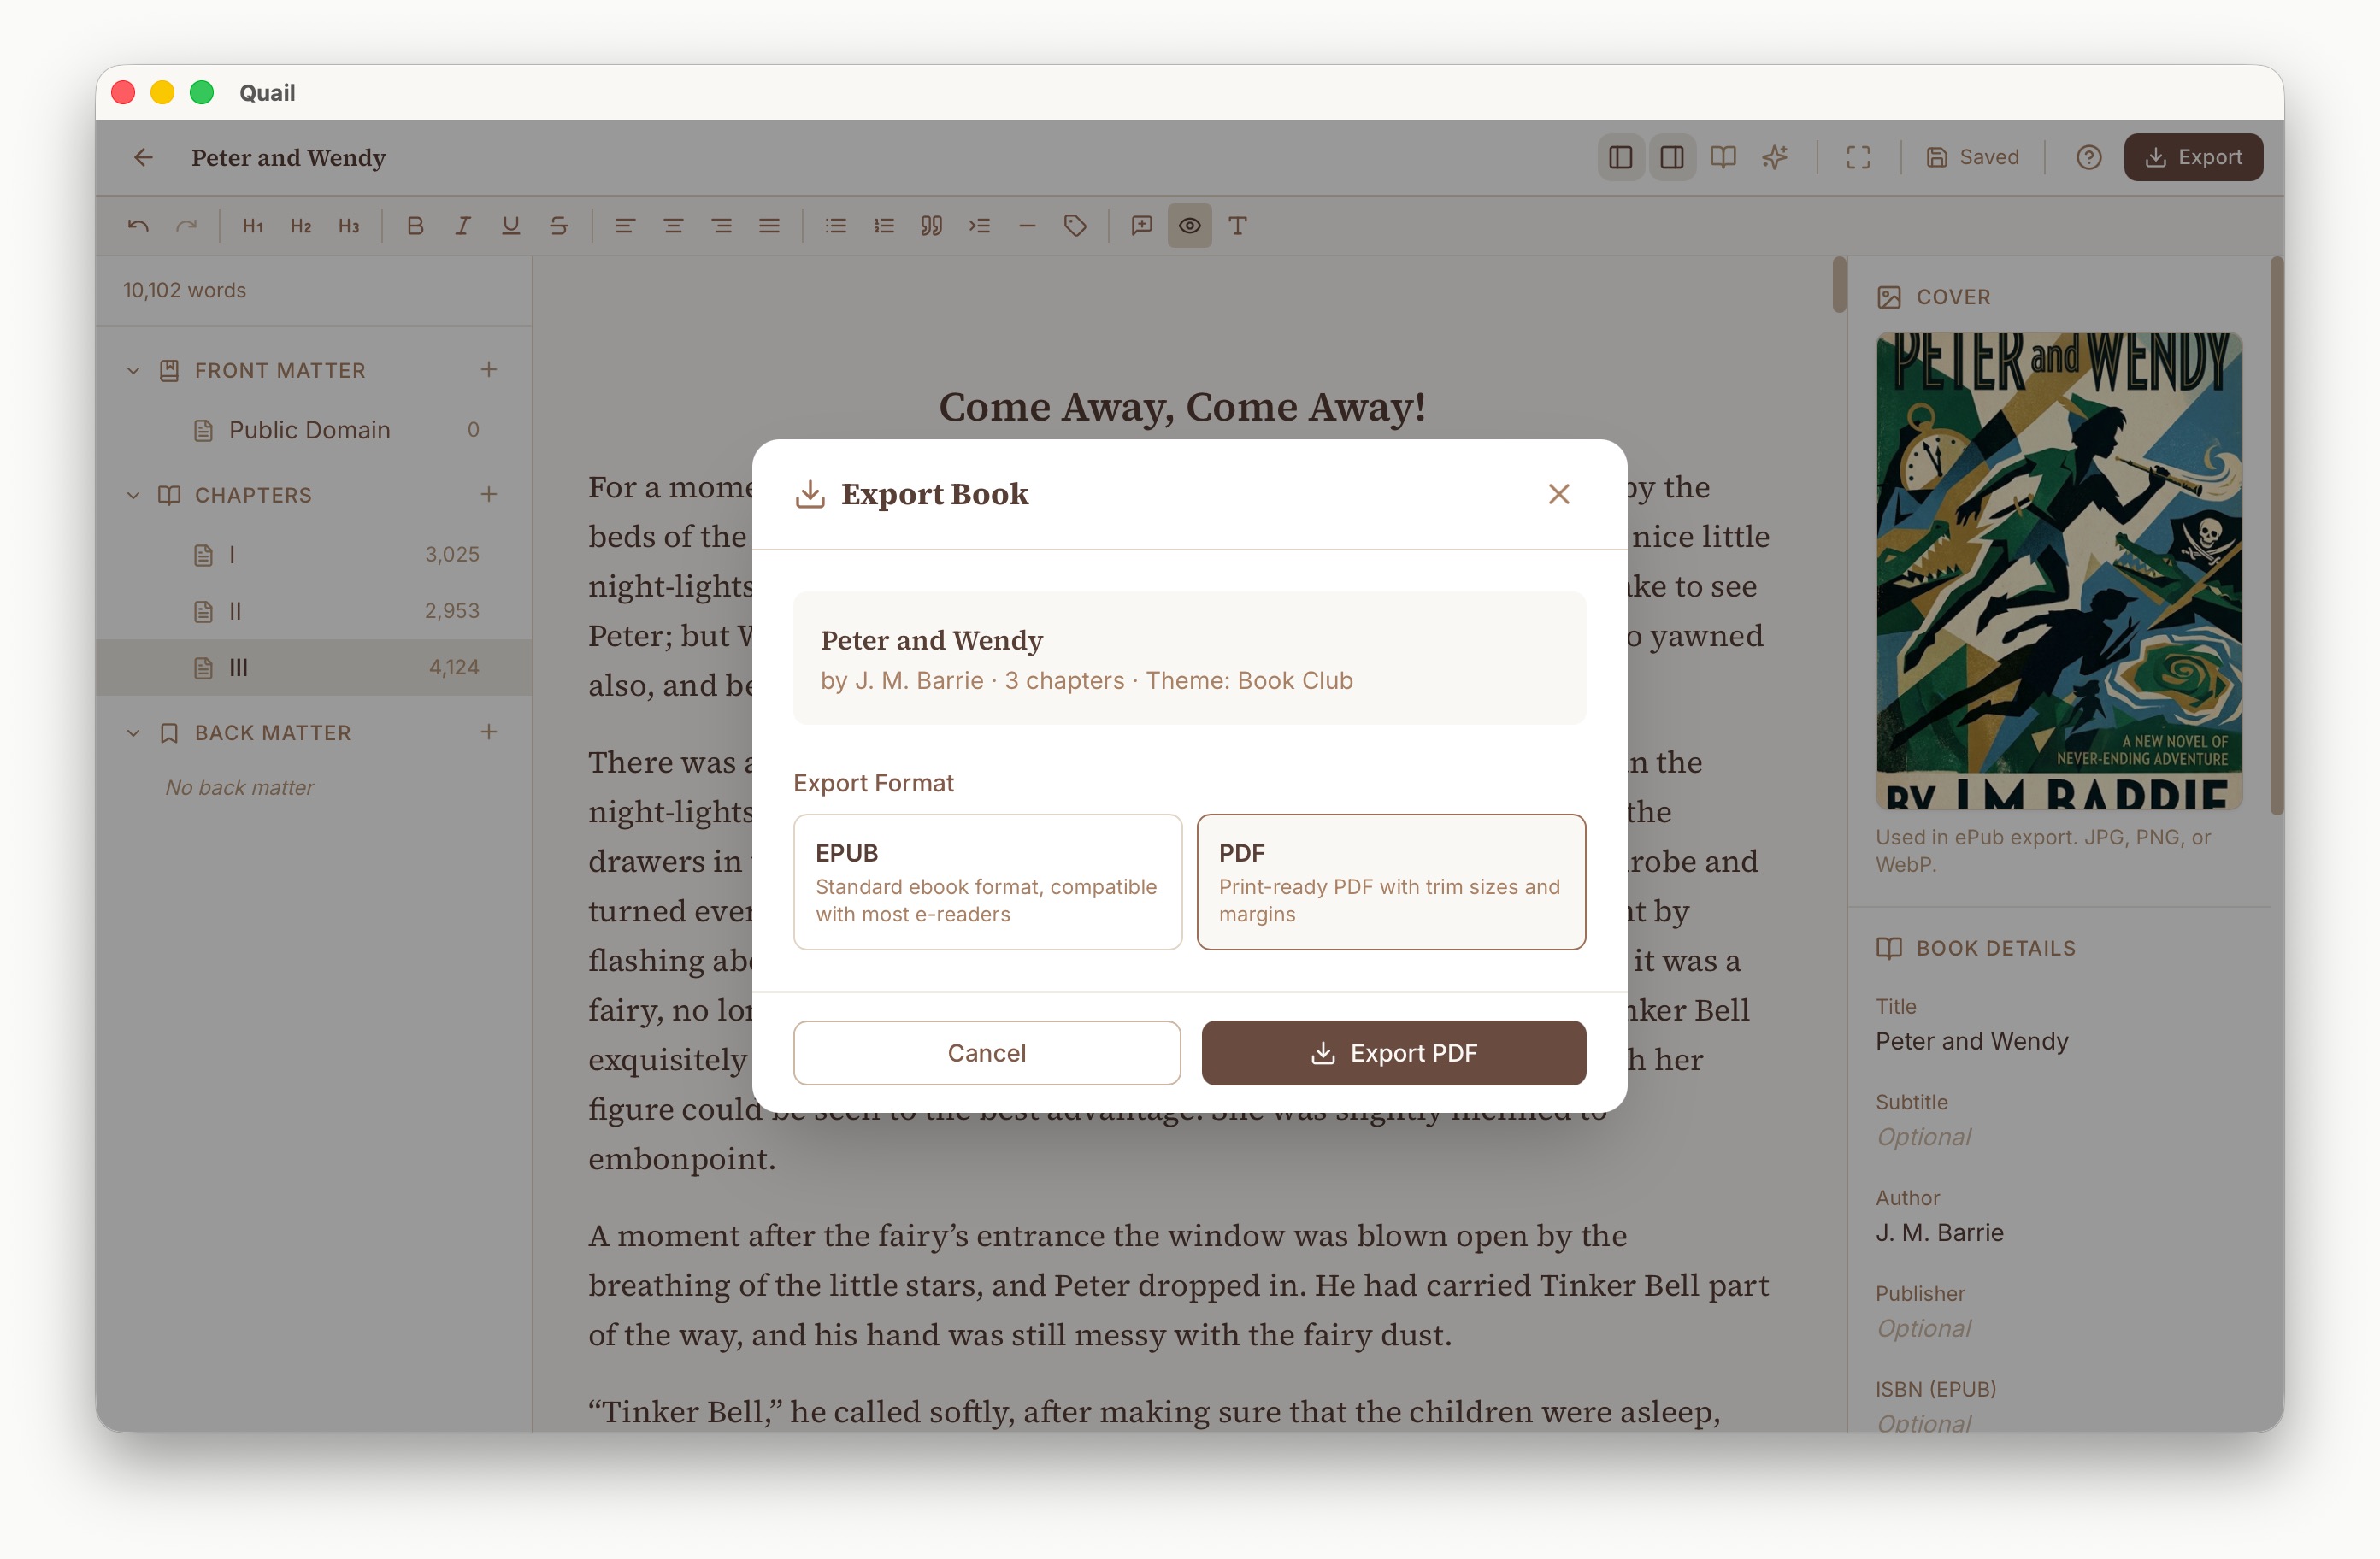
Export creates distribution-ready files for ebook and print channels. Both formats use the selected export theme for consistent typography. Always review exports before uploading to stores or distributors.
Export themes
Themes control typography, paragraph style, heading treatment, and scene breaks in both EPUB and PDF output. The Free edition includes Classic; Pro unlocks all five:
- Classic — EB Garamond, traditional serif, centred bold chapter headings.
- Literary — Cormorant Garamond, elegant serif with small-caps headings and asterisk scene breaks.
- Modern — Inter, clean sans-serif with block paragraphs and ruled headings.
- Manuscript — Source Code Pro, monospaced and double-spaced for submission.
- Book Club — Literata, warm serif with italic chapter headings.
EPUB export
- Confirm your metadata, cover image, and chapter order.
- Click Export and choose EPUB.
- Quail runs an automatic validation report alongside the export result, flagging any manifest, OPF, or structural issues that stores might reject. A clean validation means the file is ready to upload.
- Use Show in Folder to find the file, then open it in an EPUB reader to verify.
PDF export (print-ready)
- Choose a page/trim size in the Inspector — Pocket (5×8″), Digest (5.5×8.5″), US Trade (6×9″), Royal (6.14×9.21″), A5, and more.
- Choose an Interior (PDF) mode in the Inspector: Black & White (the cheap, POD-friendly default — Quail converts images to true greyscale and strips colour profiles for clean preflight) or Colour (for cookbooks, kids’ books, photo books — RGB and ICC profiles preserved). Print services typically charge more per copy for colour interiors.
- Click Export and choose PDF.
- Use the Live Preview panel while you write to spot-check pagination chapter-by-chapter, then review the final PDF before uploading to your distributor.
Quail’s print PDFs use mirror margins for correct binding and proper trim dimensions. In Black & White mode, every embedded image is genuinely single-channel greyscale and text/vectors are written as DeviceGray/DeviceCMYK — designed to pass Amazon KDP and IngramSpark preflight checks without manual adjustment.
Interior (PDF) toggle
Exporting ePub and PDF
6) Troubleshooting and Help
- I paid but did not receive a license key.
- Check spam/promotions folders first. Then contact support@quailwriter.com with your payment email and approximate checkout time.
- License activation isn’t working.
-
Confirm the key is copied exactly with no extra spaces. If it
still fails, you can reset your license data by deleting
~/.quail/license.json(macOS/Linux) or%USERPROFILE%\.quail\license.json(Windows), then restarting Quail. Do not delete the entire~/.quailfolder — it contains your projects. - Import formatting looks different from my source file.
- Normalize heading levels and scene break markers in the source document, then re-import and review chapter boundaries.
- PDF pages do not match my target print spec.
- Re-check selected page size in the Inspector and try a different trim size. Quail handles margins and colour space automatically, but the trim must match your distributor’s requirements.
- How do I show different ISBNs in my EPUB and print editions?
-
Enter each ISBN in the Inspector under
ISBN (EPUB) and ISBN (PDF).
Then type
{{ISBN}}on your copyright page (or use the ISBN tag button in the toolbar). Quail substitutes the correct one for each export format automatically. - My PDF has colour images but they look greyscale in the export.
- That’s the Black & White interior mode — the default, because most novels print B&W and POD services otherwise warn about ICC profiles. Open the Inspector and switch Interior (PDF) to Colour to preserve RGB and ICC profiles. Be aware that colour interiors cost more per copy at KDP, IngramSpark, and similar.
- IngramSpark / KDP flagged ICC profiles in my PDF.
- Switch Interior (PDF) in the Inspector to Black & White and re-export. Quail will strip ICC profiles, convert images to true greyscale, and rewrite text/vectors to DeviceGray/DeviceCMYK so preflight stops warning.
- How do I set a daily writing goal?
- Open the Inspector and find the Goal section. Set Target words (your total book target), Target date, and an optional Daily goal. Quail shows progress vs. target, suggests a daily pace to hit your deadline, and tracks a streak of consecutive days at or above the daily goal. Leave any field blank to skip it.
- Can I ask the AI about a specific passage as I write?
- Yes — highlight any text in the editor and a small Ask pill appears just above the selection (you need the LLM configured in AI Tools). Click it to open a popover with suggested prompts ("Is this medically accurate?", "Is this historically plausible?", "Is the terminology correct?") and a textarea for your own question. Press Enter to submit; keep asking follow-ups in the same window.
Need direct help? Email support@quailwriter.com with your Quail version, operating system, and a brief issue summary.